
Crafting stunning product videos is an art that balances visual appeal with clear messaging. Lighting plays a pivotal role in achieving this balance, transforming ordinary footage into captivating visual stories. As digital content creators, understanding and utilizing lighting techniques can elevate your product videos, enhancing both brand perception and viewer engagement.
In this guide, we’ll delve into the essentials of lighting for product videos, from choosing the right equipment to effectively combining natural and artificial light. Whether you’re a seasoned professional or just starting out, these insights will help you create visually compelling content that stands out.
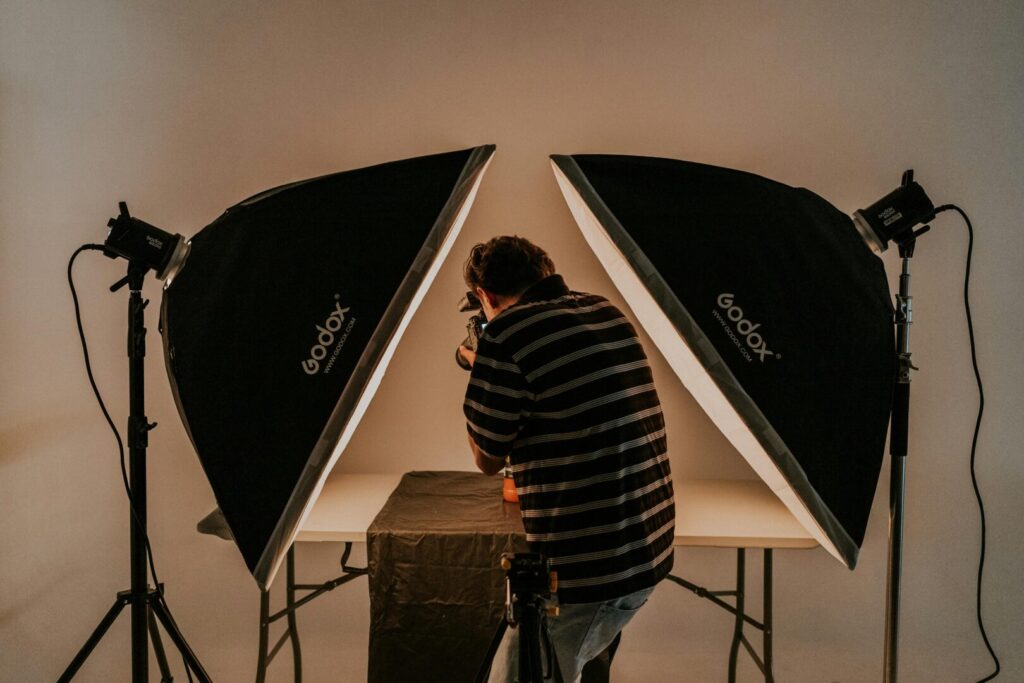
Lighting is more than just an aesthetic choice; it directly affects how viewers perceive your product. The right lighting can highlight the texture, color, and form of a product, making it appear more appealing and desirable. Conversely, poor lighting can obscure details and create an unprofessional impression. For instance, using soft lighting can minimize shadows, presenting a clean and polished look, ideal for showcasing delicate items like jewelry.
Consider using a combination of key, fill, and backlighting to create depth and dimension. This technique not only enhances the product’s features but also directs focus where it matters most. Remember, viewers often associate high-quality visuals with high-quality products, influencing their purchasing decisions. For more insights on how visual trends impact branding, see our article on graphic design trends.
Lighting is instrumental in reinforcing your brand identity. Consistent lighting styles can become a signature element of your brand’s visual language, distinguishing your products from competitors. For example, a tech brand might opt for cool, bright lighting to emphasize innovation and precision, whereas a lifestyle brand could choose warmer tones to evoke comfort and authenticity.
Ensure your lighting choices align with your brand’s values and target audience. Experiment with different setups during pre-production to find the balance that best represents your brand. It’s also essential to document these settings for future consistency, helping maintain a cohesive brand image across all video content.
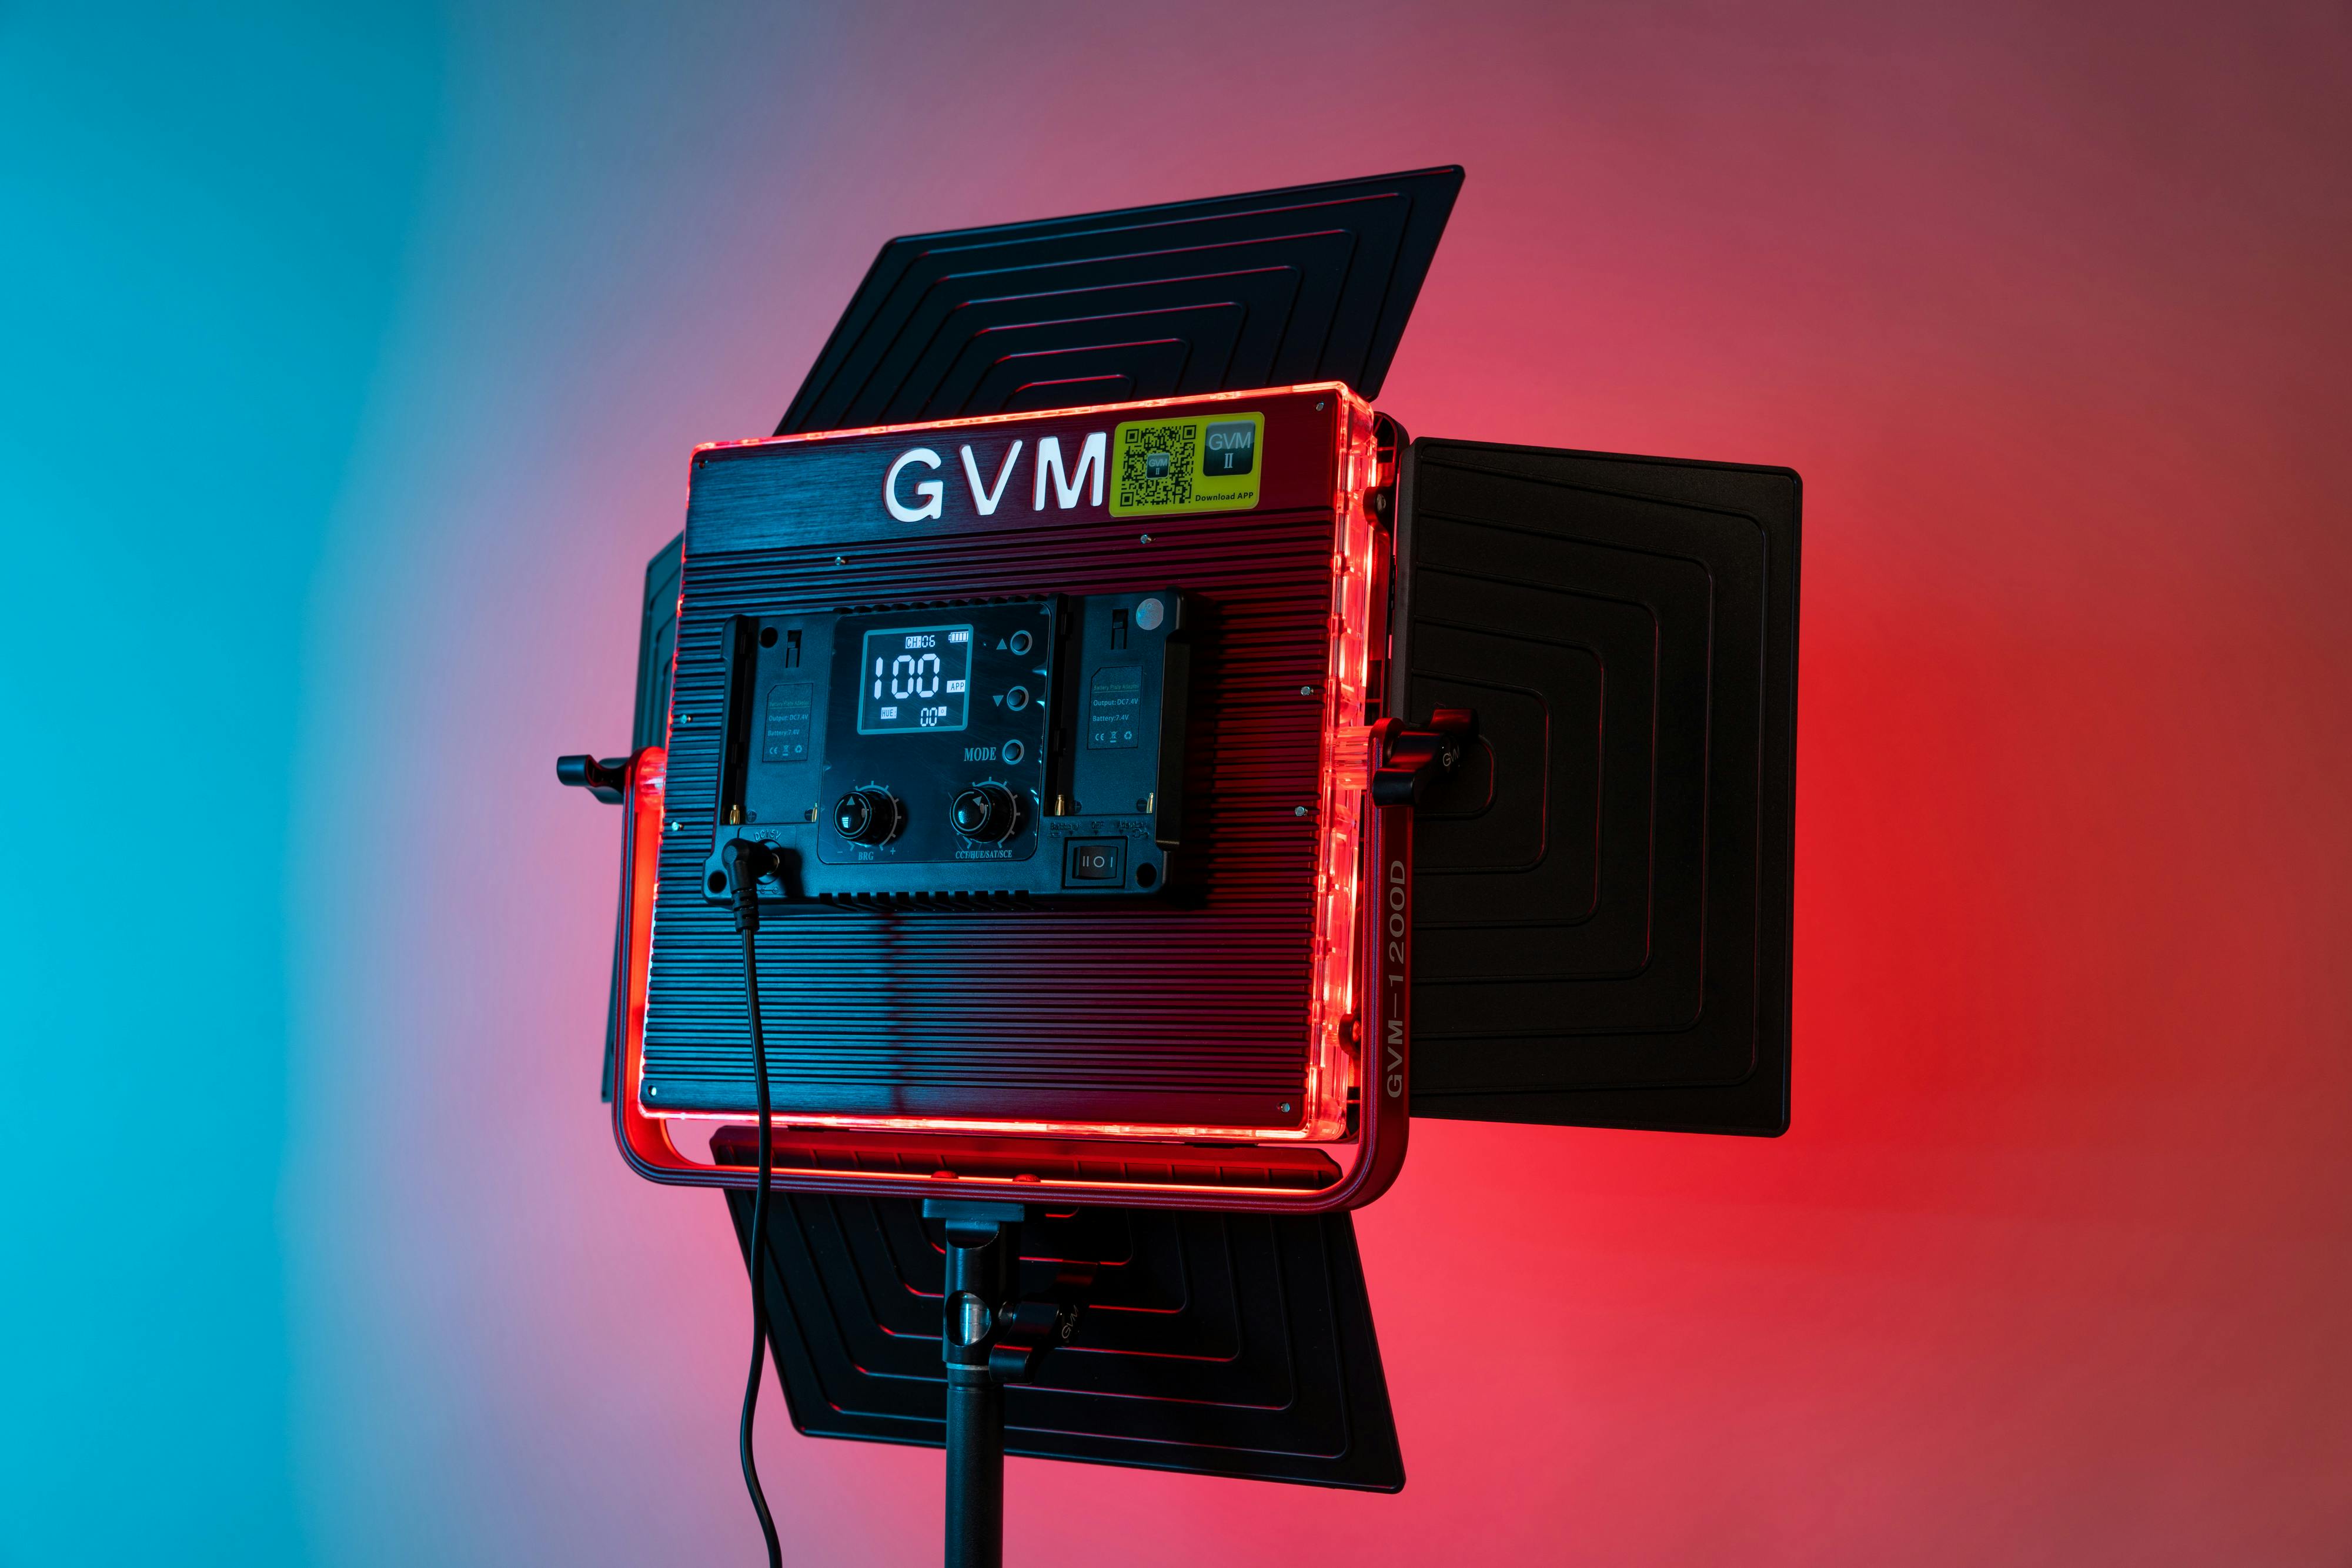
When selecting lighting equipment, understanding the differences between LED and fluorescent lights can inform your decision. LED lights are renowned for their energy efficiency and longevity, emitting minimal heat, which is ideal for long shoots. They also offer a range of color temperatures, making them versatile for various products and moods. However, they can be more expensive initially compared to fluorescent lights.
Fluorescent lights, on the other hand, provide a softer light, ideal for reducing harsh shadows. They are generally more affordable but may require additional care in handling, as they can be fragile. Assess your budget and specific lighting needs to determine which type best suits your projects.
For those working within a limited budget, there are several cost-effective lighting solutions available. Consider DIY options, such as using natural light or affordable reflectors to enhance illumination. Reflectors can be made from household items like aluminum foil or white poster boards to bounce light and reduce shadows.
Additionally, investing in a few quality LED panels can transform your setup without breaking the bank. Look for portable, battery-operated models that offer adjustable brightness and color temperature. Combining these tools with strategic use of natural light can yield professional results without excessive expenditure.
Creating a tailored lighting setup is crucial for effectively showcasing products of different sizes. Smaller items, such as watches or jewelry, benefit from close, focused lighting to accentuate fine details. Use micro LED lights or dedicated macro lighting kits for precision. Conversely, larger products like furniture require broader, more even lighting to ensure the entire item is well-lit.
Experiment with the distance and angle of your lights to find the optimal setup. For larger items, consider using multiple lights to cover different angles, ensuring comprehensive coverage without harsh shadows.
Incorporating background and fill lights can significantly enhance your product video’s overall look. Background lights add depth to your scene, separating the product from the backdrop and creating a more three-dimensional appearance. These lights can be colored or patterned to align with your brand’s identity.
Fill lights, which are softer than key lights, help balance out shadows cast by the main light source. They are essential for achieving a natural look, particularly in more complex setups involving multiple light sources. Adjusting the intensity and placement of these lights can prevent your product from looking flat or overly dramatic.
Natural light is one of the most authentic and accessible resources for video production. To leverage this, understand the best times of day for shooting. Morning and late afternoon are often ideal, offering soft, diffused light that reduces harsh shadows. Known as the “golden hour,” this period provides a warm glow that can enhance the overall aesthetic of your video.
Monitor weather conditions and plan shoots accordingly. Overcast days can also offer excellent lighting opportunities, providing even, diffused light that is flattering for most products.
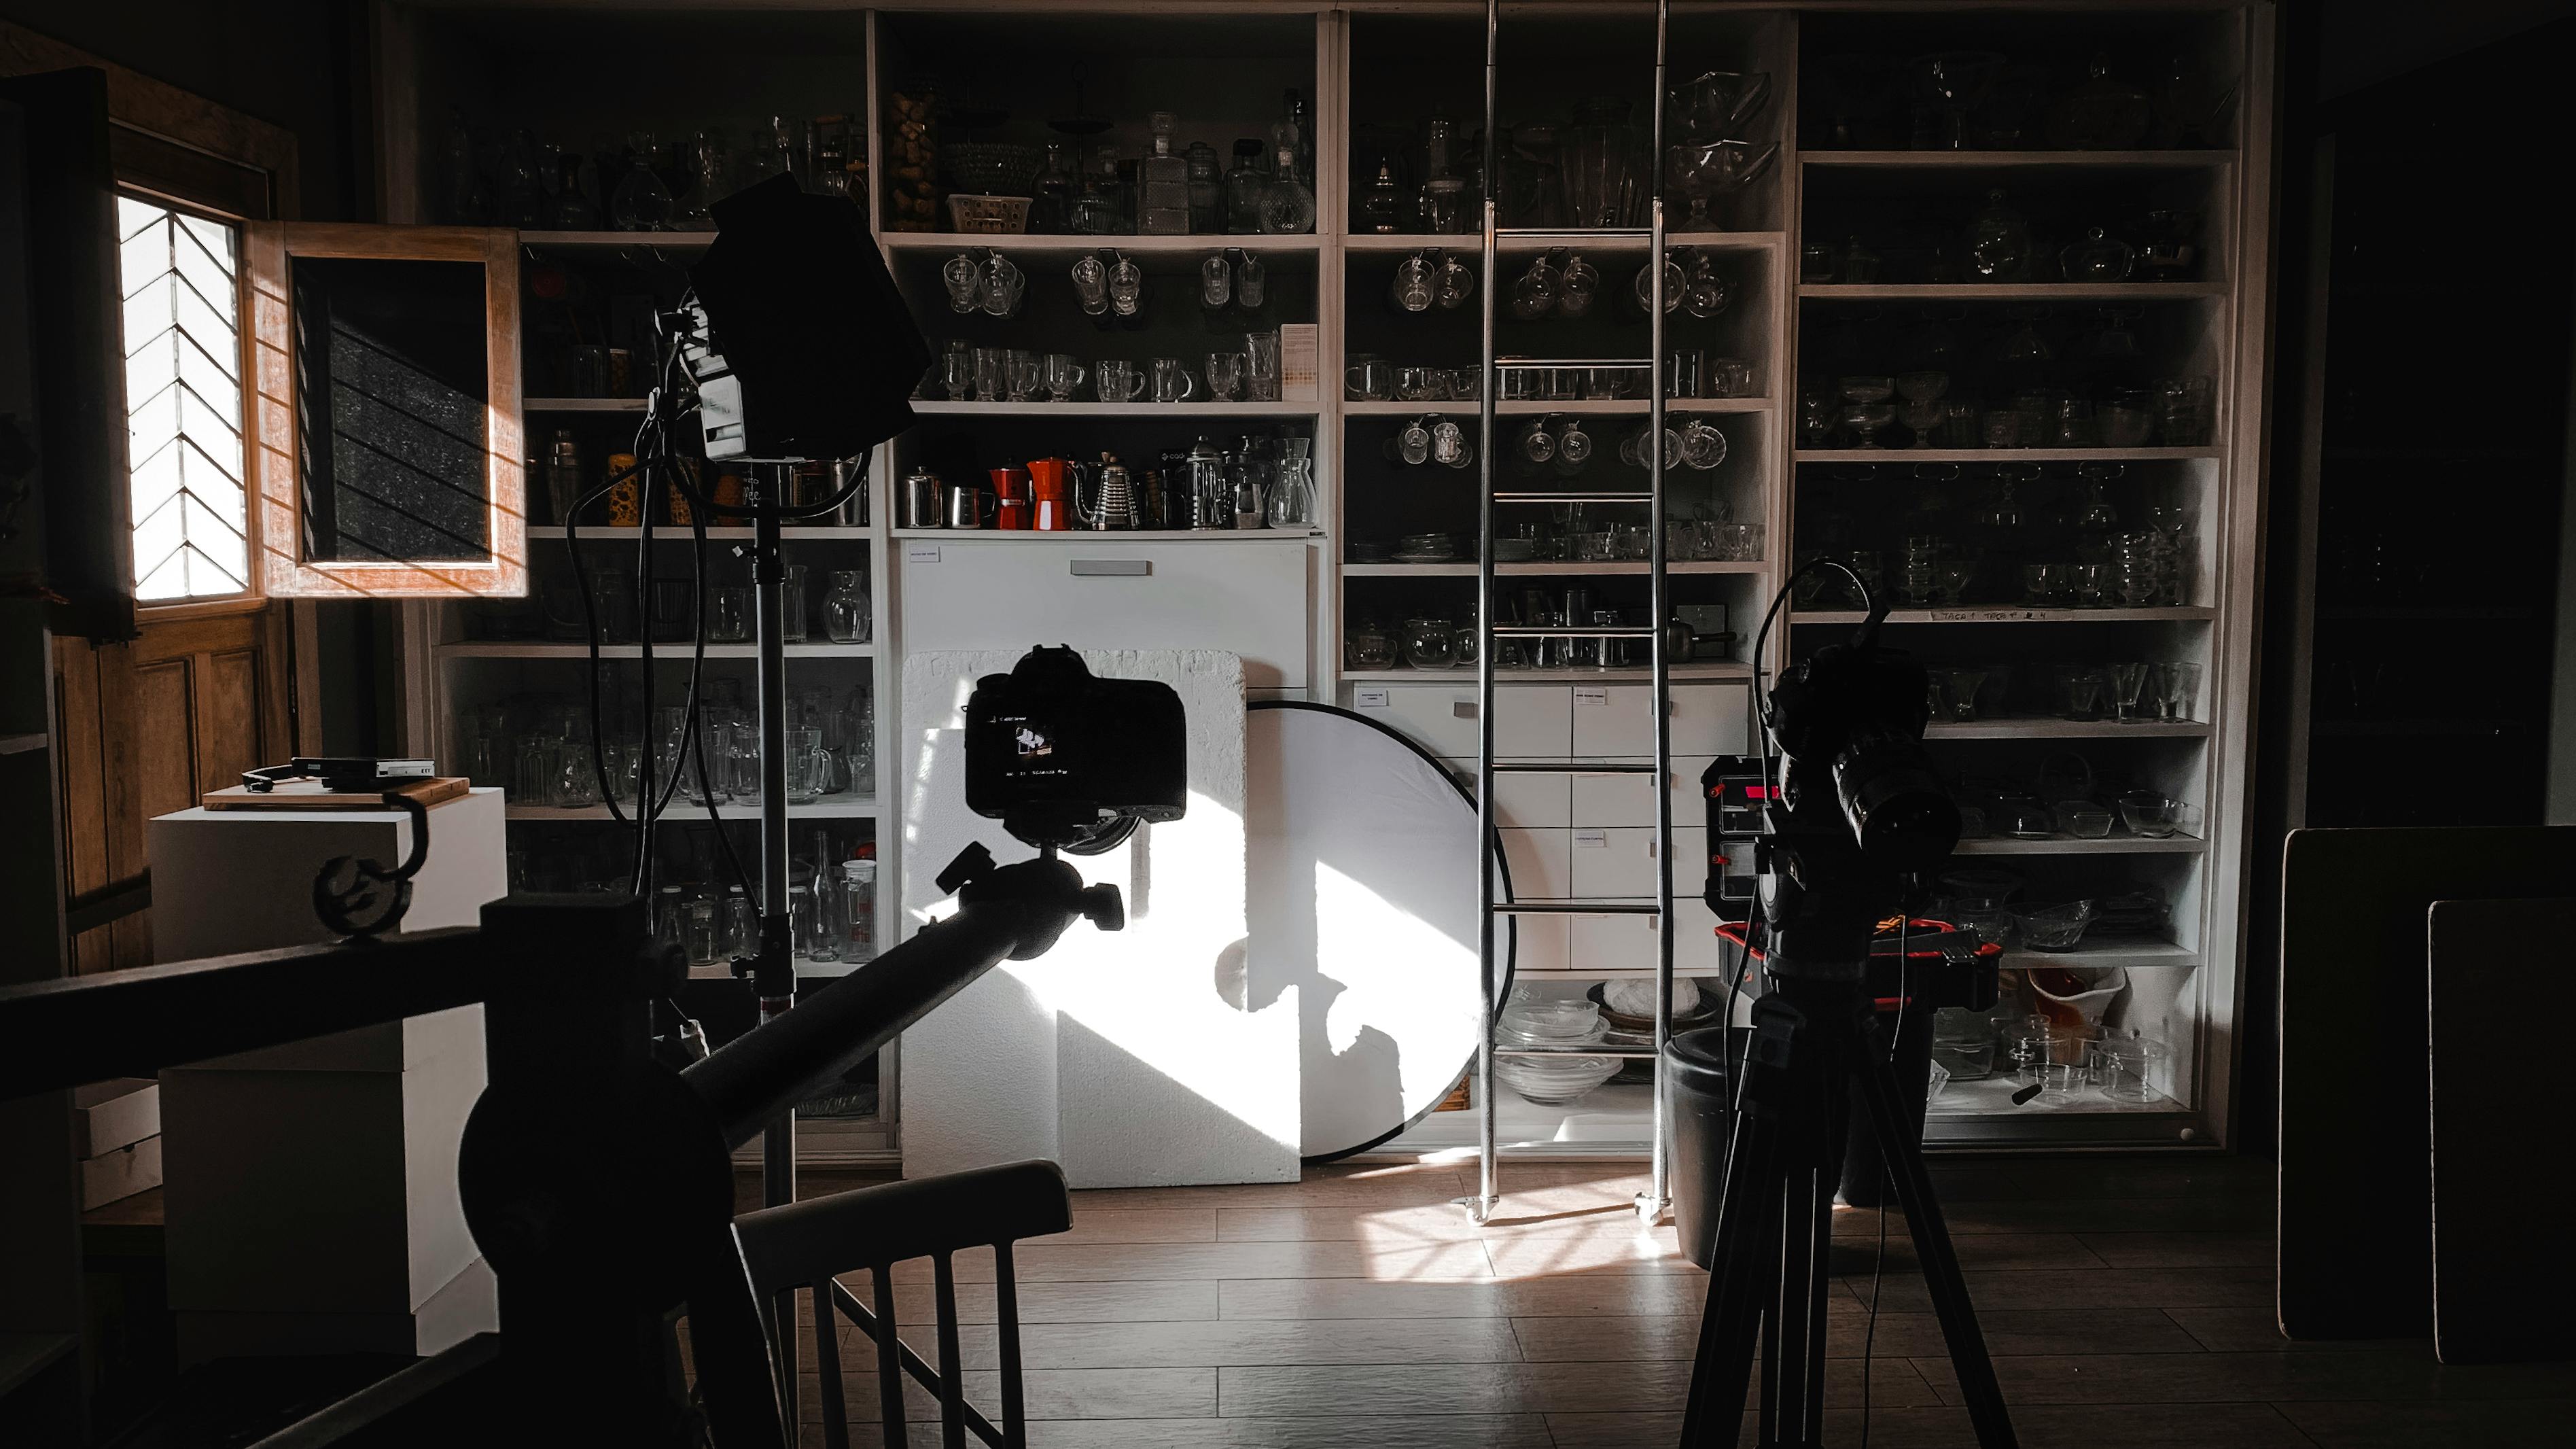
For a balanced approach, consider combining natural and artificial light. This technique allows for greater control over the lighting environment while maintaining a natural feel. Use natural light as the primary source and supplement with LED or fluorescent lights to eliminate unwanted shadows and achieve the desired color temperature.
Position artificial lights strategically to complement the natural light direction, ensuring a seamless blend. This method provides flexibility, allowing you to adapt to changing natural light conditions and achieve consistent, professional results throughout the day.
One of the most common lighting issues in product videos is the presence of unwanted shadows and glares. Identifying these can be challenging, especially if you’re filming in a space with multiple light sources. To start, ensure that your primary light source is not too harsh or directly facing reflective surfaces. Instead, consider using a diffuser to soften the light, which helps in reducing the intensity of shadows. Understanding the interplay of light and shadow can significantly improve the aesthetics of your video.
Avoid positioning lights at the same height as the camera lens as this can cause glares. Instead, try placing them at a 45-degree angle, slightly above eye level, to create a more natural look. Be mindful of background elements that might inadvertently reflect light back into the lens, creating unwanted highlights.
Inconsistent lighting can distract viewers and detract from the professional quality of your video. To maintain uniformity, use lights with the same color temperature and keep them at a consistent distance from your subject throughout the shoot. Setting up a simple three-point lighting system can help ensure that your product is evenly lit from all sides, minimizing the risk of inconsistencies.
Lighting consistency is particularly crucial when shooting multiple takes or scenes. To achieve this, mark the positions of your lights and camera so you can easily replicate the setup if adjustments are needed. Remember, even minor changes in light positioning can drastically alter the mood and tone of your video.
Color gels are an excellent tool for adding mood and character to your product videos. These translucent sheets can be placed over lights to change the color of the light beam, thereby setting the desired ambiance. For example, using blue or green gels can evoke a sense of calm or innovation, while red or orange gels can create warmth and urgency.
When selecting color gels, it’s essential to align them with your brand’s color scheme to maintain consistency across all your digital marketing materials. Experiment with different colors to see how they enhance or detract from the product’s features. A subtle tint can emphasize the texture and shape of a product, making it more visually appealing to your audience.
Spotlighting is a powerful technique to draw attention to specific features of your product. By using a focused beam of light, you can highlight intricate details that might otherwise go unnoticed. This technique works well for products with fine craftsmanship or complex textures.
To implement spotlighting effectively, use a narrow beam light source, such as a fresnel light, and adjust the focus to target the feature you want to emphasize. Ensure the rest of the product is evenly lit to avoid creating unnecessary contrast. This method not only accentuates important details but also adds depth and dimension to your video.
For creators on the go, portable lighting solutions are indispensable. Compact LED panels and ring lights are popular due to their lightweight design and ease of use. These lights often come with adjustable color temperatures and intensities, allowing for flexibility in various shooting conditions.
Consider investing in battery-powered lights to avoid the hassle of finding power outlets when shooting in unfamiliar locations. Additionally, clip-on lights can be attached directly to your phone or camera, ensuring your subject is well-lit even in dim environments. These tools can considerably enhance the quality of mobile video production without the need for bulky equipment.
Shooting in confined spaces presents unique challenges, especially in terms of lighting. Utilizing reflective surfaces like white walls or mirrors can help bounce light and evenly illuminate the space. When setting up, try placing lights at varying heights to reduce shadows and create a more dynamic look.
Using versatile lighting equipment, such as flexible LED strips, can provide light in hard-to-reach areas. These strips can be strategically placed to add depth and prevent your video from looking flat. Remember to keep clutter to a minimum to avoid casting unnecessary shadows.
Even with meticulous planning, your footage might still require tweaks in post-production. Most editing software offers tools to adjust light levels, helping you achieve the desired visual balance. Start by using the brightness and contrast tools to correct any exposure issues present in the footage.
Take advantage of the software’s histogram or waveform monitor to assess the light distribution across your video. This data can guide you in making accurate adjustments without overexposing highlights or losing detail in shadows. By refining these elements, you can enhance the overall clarity and impact of your video.
Color correction is a crucial step in post-production that ensures the colors in your video appear natural and consistent. This process can help fix any lighting discrepancies and ensure that your product looks true-to-life. Begin by adjusting the white balance to set a neutral baseline for colors.
Employ advanced tools such as curves and color wheels to fine-tune shadows, midtones, and highlights. These adjustments can significantly improve the visual appeal of your video by making colors pop and ensuring that your product stands out. Consistent color grading also aids in maintaining brand uniformity across various platforms and media.
Understanding how top brands use optimized lighting in their product videos can provide invaluable insights for digital creators. Let’s explore some renowned campaigns and dissect their lighting techniques. A standout example is the campaign by a leading smartphone brand, which utilized a simple yet effective three-point lighting setup. This technique, often favored by professionals, uses key light to highlight the subject, fill light to reduce shadows, and backlight to separate the subject from the background, creating a more dynamic image.
The success of these campaigns often hinges on their adaptability to different environments. For instance, a recent campaign by a popular sportswear brand used natural lighting to complement their eco-friendly product line, emphasizing the importance of aligning lighting choices with brand values. You can read more about how graphic design trends influence such choices.
Moreover, consistency in lighting is crucial. A skincare brand’s viral video maintained uniform lighting across different scenes, ensuring a seamless visual flow that kept the audience engaged. These examples show how thoughtful lighting decisions can enhance product storytelling and bolster brand growth.
Professional productions offer a wealth of lessons in lighting for product videos. One key takeaway is the importance of color temperature. Inconsistent color temperatures can disrupt a video’s visual harmony. Professionals recommend using daylight-balanced bulbs to maintain a natural look, enhancing the product’s appeal without altering its true colors.
Another lesson involves the strategic use of diffusers and reflectors. For example, diffusing lights can soften shadows and create an inviting ambiance, as demonstrated by a luxury watch campaign that used softboxes to accentuate their product’s sophistication. Meanwhile, reflectors can be employed to bounce light into shadowy areas, making details pop without adding harshness.
Attention to ambient lighting also plays a crucial role. Successful campaigns often incorporate ambient light to add depth and context. For instance, an electronics brand’s campaign cleverly used ambient lighting to simulate real-world usage scenarios, enhancing online visibility by making the product relatable.
By examining these professional approaches, digital creators can refine their techniques, leading to more visually compelling product videos. With these insights, you can achieve a professional standard in your creative projects.